Get started contributing to open source through civic tech
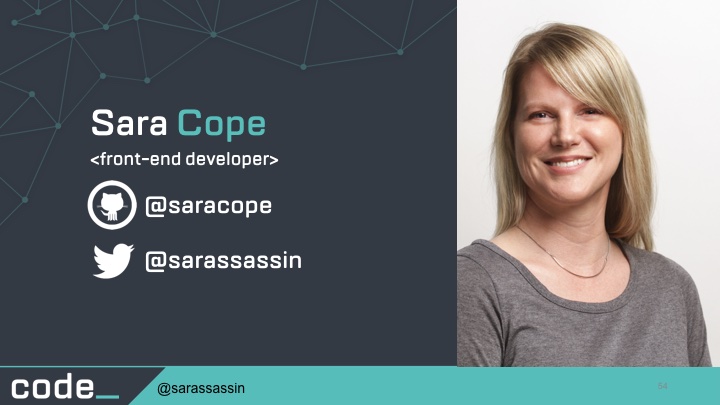
Sara Cope

I'm Sara Cope, a developer with the federal government at the General Services Administration. I work on our Open Source and Innovation teams, primarily on code.gov, which is an open source project and also is our platform for inventorying open source code in the federal government.
GitHub: saracope
Twitter: sarassassin
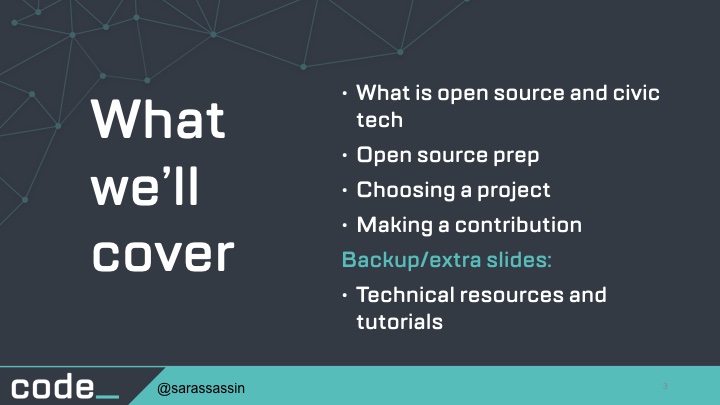
What we’ll cover
- What is open source and civic tech
- Open source prep
- Choosing a project
- Making a contribution
- Backup/extra slides:
- Technical resources and tutorials
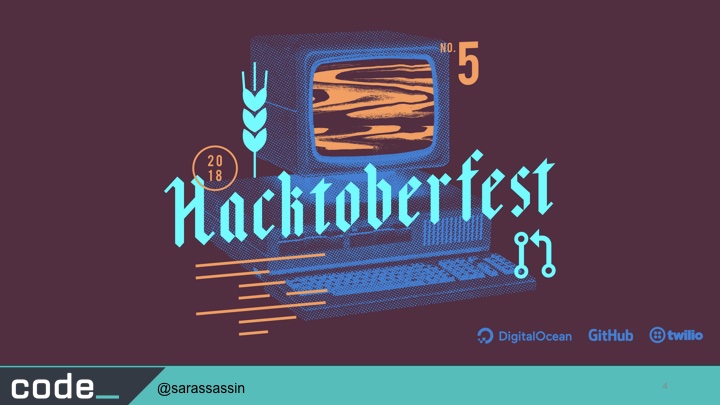
One of the motivations behind doing this talk is the Hacktoberfest event which is a month long celebration of open source put on by GitHub, DigitalOcean, and Twilio. As a way to encourage open source, they will send a free t-shirt and stickers to anyone who has submitted 5 pull requests in October and registered on hacktoberfest.digitalocean.com
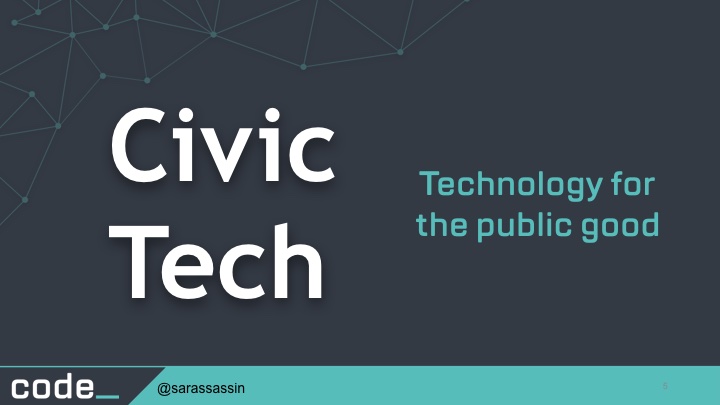
Civic tech is technology that enables greater participation in government or assists government in delivering citizen services and strengthening ties with the public.
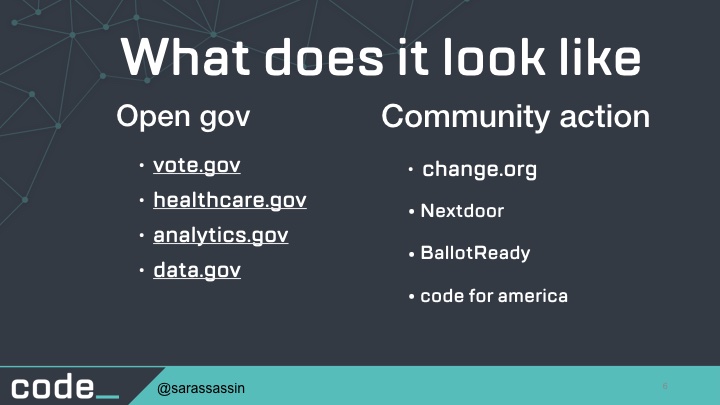
At a high level, Civic tech can be divided into 2 groups: Open Government and Community Action.
Open government represents the group of projects aimed an enabling top-down change through the promotion of government transparency, accessibility of gov data and services, and promotion of civic involvement in the democratic process. Examples of that are vote.gov, healthcare.gov, analytics.gov, and data.gov.
Community action represents the group of projects aimed at catalyzing bottom-up reform through peer-to-peer information sharing, funding, and collaboration to address civic issues. Examples of that are change.org, Nextdoor app, BallotReady, and projects by Code for America/Code for Dayton.
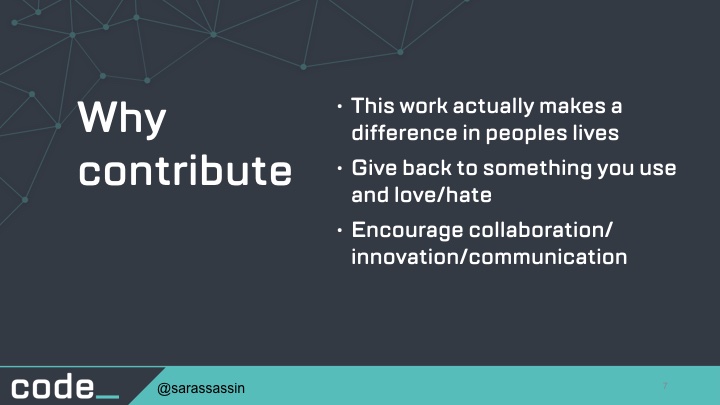
Why contribute
This work actually makes a difference in peoples lives
Give back to something you use and love/hate
Encourage collaboration/innovation/communication
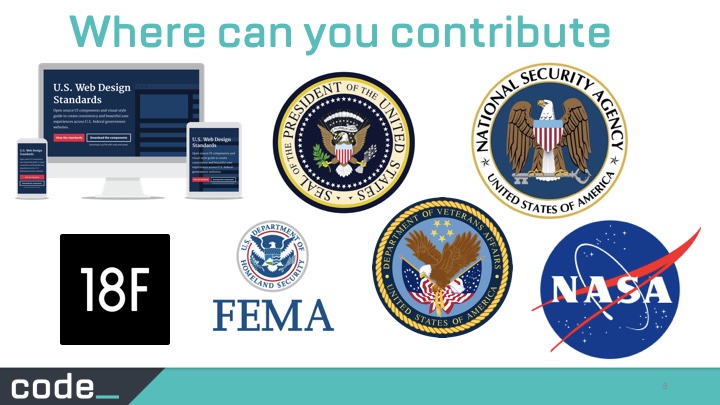
There are a lot of different places where you can contribute. This is just a very small subset of orgs available and include some you wouldn’t think have open source code like NSA, and the Executive Office of the President.
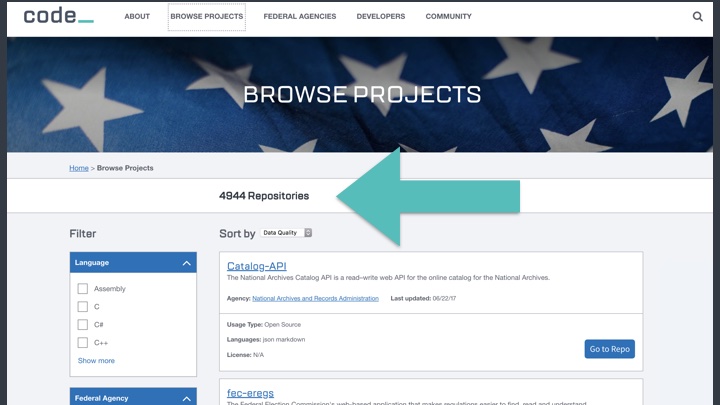
Code.gov inventories open source code in the government and has almost 5 thousand projects to choose from.

We also have a list of 30 select open tasks which have been identified my the project maintainers as wanted contributor help.
Intro to Open Source
Code that publicly available
Can be freely used, changed, and shared by anyone
Has a license that declares specific terms of use
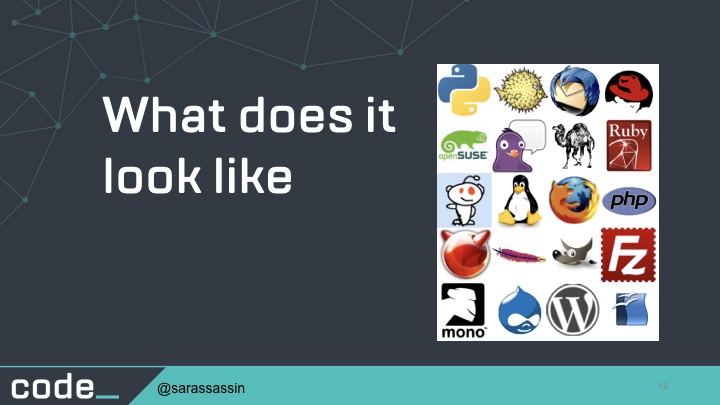
So even if you’re not really familiar with open source, you probably still interact with it every day. Here are a few examples of open source projects you may be familiar with. There are thousands more out there.
Image credit: https://www.flickr.com/photos/grokcode/3084292004
Contributor benefits
So what benefits do you get out of contributing to open source?
gain experience
improve existing skills
give back to the community
influence the product roadmap
find mentors and teach others

Open source myth busting
1. You have to know everything about the project before you contribute
Not even maintainers always know everything about a project.
2. Coding is the only way to add value to a project
Non-code ways to contribute: testing, documentation, graphic design, accessibility testing, translation, community organizing, issue triage, community growth.
3. Project maintainers are laughing at your missteps
No one is laughing at you. Maintainers love getting contributor submissions. We’re here to encourage that and grow the community.
Open
Source
Wayfinding
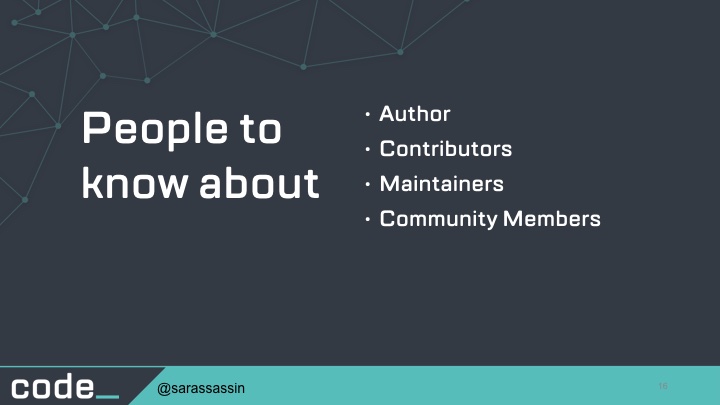
A typical open source project has the following types of people:
Author: The person/s or organization that created the project
Contributors: Everyone who has contributed something back to the project.
Maintainers: Contributors who are responsible for driving the vision and managing the organizational aspects of the project. (They may also be authors or owners of the project.)
Community Members: People who use the project. They might be active in conversations or express their opinion on the project’s direction.
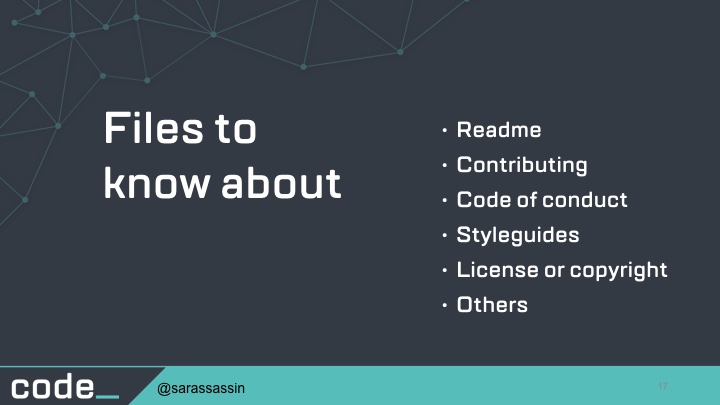
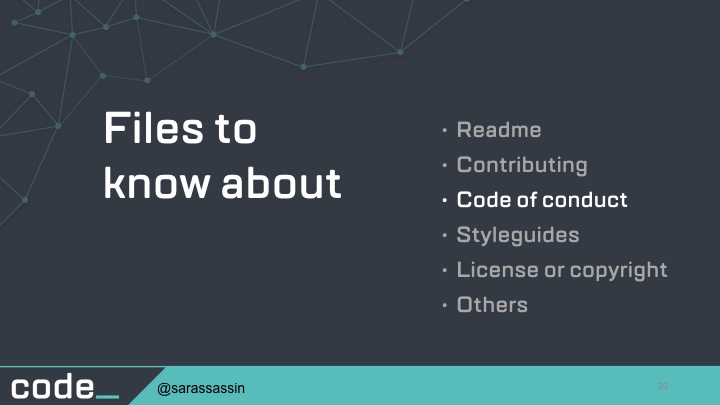
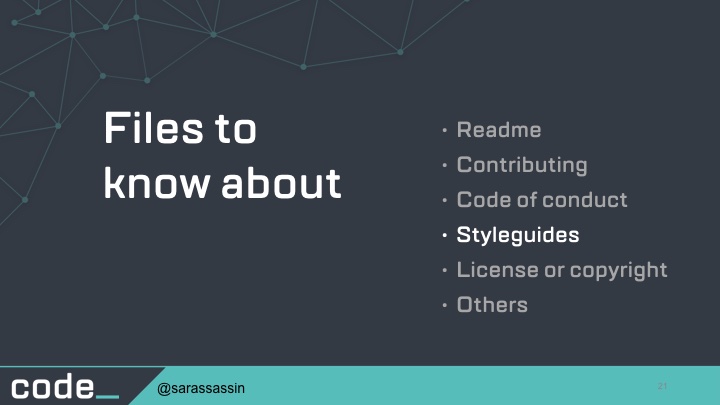
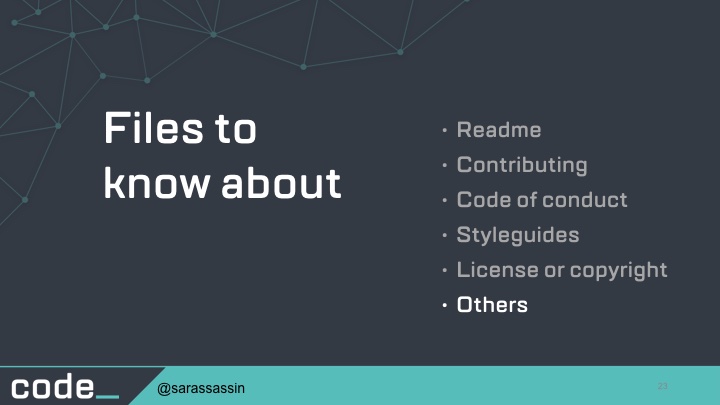
Before you start searching for and reviewing potential projects for your contribution, you should have some familiarity with what files you may see. Not all of the files mentioned here exist in all projects, but they’re common enough that knowing about them makes it much easier for you to navigate projects.
Readme
Contributing
Code of conduct
Styleguides
License or copyright
Others
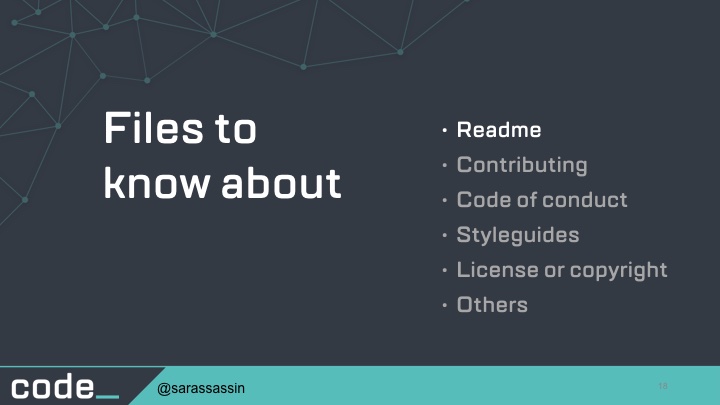
Typically the very first thing you see for a project is its README file. This is the project’s face to the world. The README file tells you the name of the project and what it’s intended to do, giving you a quick snapshot to see whether it’s a project that might be useful or interesting to you.
The contents of README files vary. Some projects use the file simply to name the project and point you to other resources. Others include those other resources—installation instructions, developer setup, example usage—in the README file itself. The contents of this file are entirely up to the project.
Regardless of the contents, the README file should be your first stop when you visit any project. It can give you a very good sense of what the project is and where to look for more information about it.
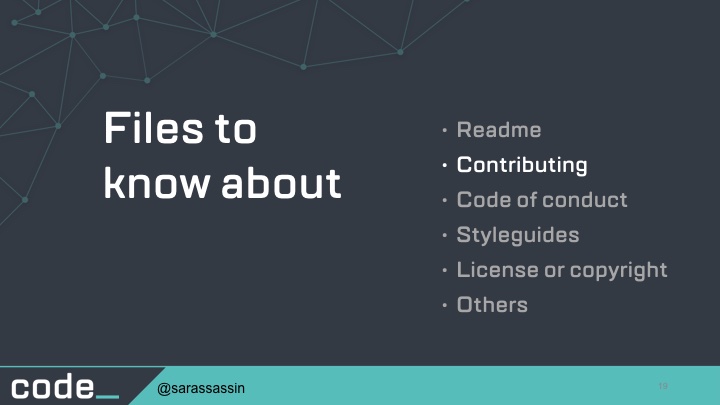
The CONTRIBUTING file is your best friend when interacting with a project. It file sets out how the project prefers to receive contributions, and the requirements and parameters a contribution must meet to be accepted into the project. (also sometimes called CONTRIBUTORS file)
The Code of Conduct (CoC) is a document that is appearing in more and more projects every year. It is used set the behavior guidelines that are both welcome and unwelcome in that project community, the consequences for unwelcome behavior, and where and how community members can report it. The intention of the CoC is to encourage behavior that creates a welcoming and safe place for all contributors. The existence of a Code of Conduct is a sign that a project values the safety of its community and is willing to back that up with action.
Depending on the project, you may find a styleguide for programming, for writing, for graphic design... It all depends upon the needs and preferences of the project. Sometimes these guides are included directly in the CONTRIBUTING file, other times they are standalone documents. Whichever way they’re implemented, you must always read and follow these guidelines if they exist.

The LICENSE file declares the terms under which folks are permitted to use, modify, and distribute the project.
It’s only through that LICENSE file that a project can be “open source,” and only through that LICENSE file that the project can legally be used, modified, and distributed.
If you come across an interesting project that isn’t licensed at all or has a license that isn’t OSI-approved, be very careful before you contribute to it and throw yourself into a complicated and suspect copyright situation.
Those were the files you’re most likely to encounter when browsing open source projects, but a few more are relatively popular, particularly in older or very well-established projects.
The INSTALL or INSTALLATION file is pretty much exactly what you would expect: instructions for how to install and optionally configure the project for use. This file is more common in projects that use make for compiling and installing the software, but there’s no reason it couldn’t be included in any project (and it often is).
CHANGES or CHANGELOG is, again, fairly self-explanatory. This file contains a human-readable summary of all of the releases for the software and the changes that comprise each. The CHANGES file can be very handy if you’re trying to determine whether the version of the software you’re using includes a certain bug fix. It’s also helpful for new contributors to see the development trajectory of the project.
An issue tracker is where a project tracks individual issues in the project. This may also be called bug tracking or a ticketing system. Issue trackers are vital for making sure the project knows what’s going on, when, and by whom.
So you’ll want to get familiar with how a project is using it’s issue tracker. Do they only enter bugs, does it include design discussions, does it layout new or upcoming features.
The only wrong way to use a project’s issue tracker is “anything different from how the project uses it.” Don’t inject your own preferences or workflow into a project’s issue tracker. Sometimes a project documents its issue workflow. If it does, follow it. If it doesn’t, have a look at completed (“closed”) issues to see which workflow was used for them.
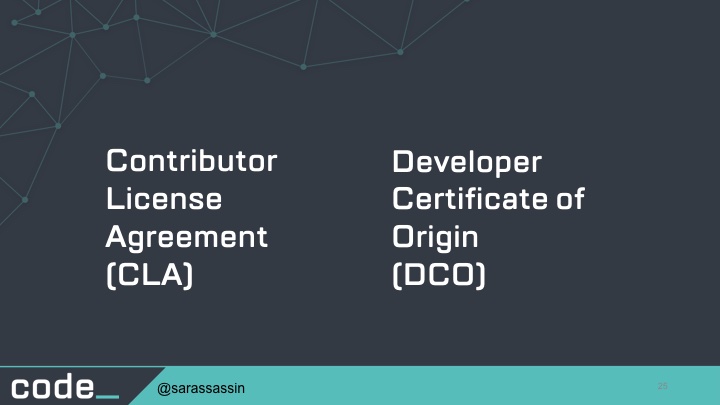
A few open source software projects require all contributors to agree to either a Contributor License Agreement or a Developer Certificate of Origin before their contributions can be merged and distributed with the software.
So these are 2 things you want to be aware of.
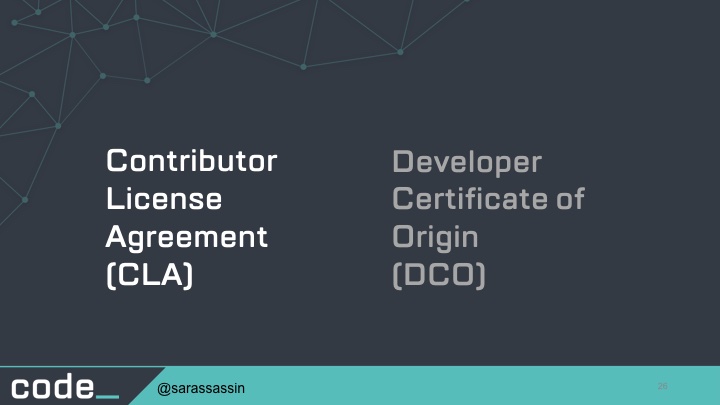
The CLA, basically says that you have the right to share your contributions, agree that the project has a license to alter, distribute, and administer those contributions.
The intention of the CLA is to minimize potential legal complications of distributing the work, as well as to potentially make it easier to change license.
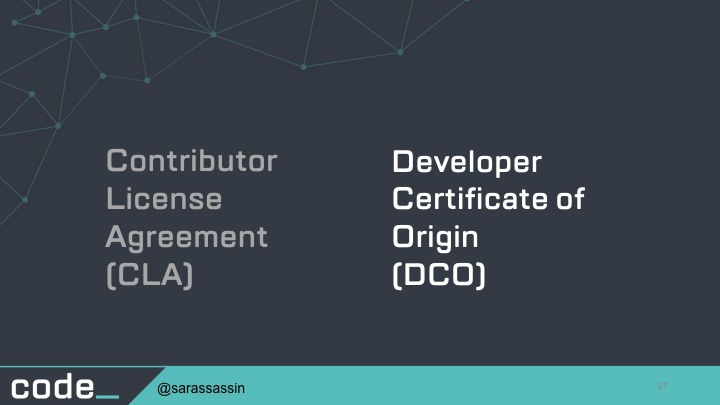
This has become a more popular alternative to CLAs. A DCO relies upon a contributor signing their contribution using the -s or --signoff flags of the git version control system. This tells the project that they have the right to distribute their contribution and do so under the same conditions as the project license.
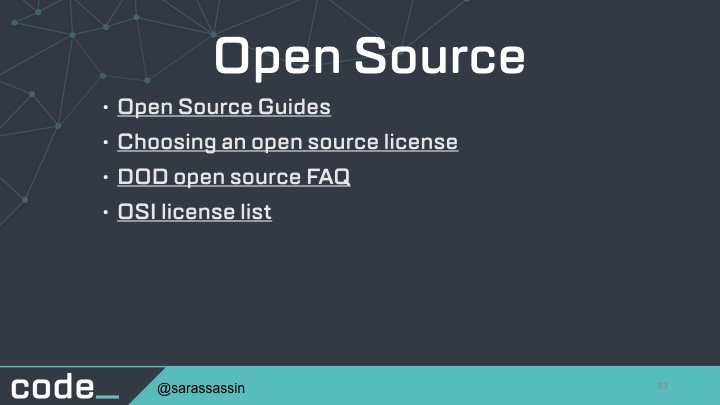
The best place to learn about the various types of free and open source software licenses is the Open Source Initiative Licenses list. It can be a little overwhelming at first, so to get you started, here’s a quick introduction to the two basic types of open sources licenses: copyleft and permissive.
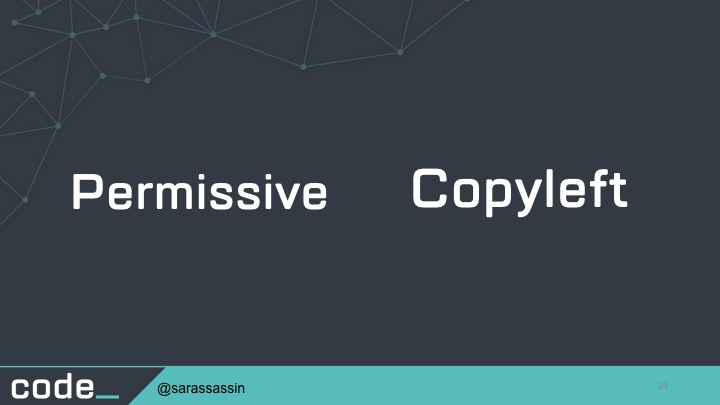
Both of these licenses share the requirement that anyone who uses works licensed under one of them must be able to view, modify, and share the source of the work. The difference comes after that:
With a permissive license, someone who makes a change and redistributes the software is permitted to change the terms and conditions under which someone can use the new distribution. To put that plainly, the creator may change the license of the new distribution to one that’s different from the original work.
This gives the person releasing the new distribution a lot of flexibility in defining how the derivative work may be used. Two popular permissive licenses are the Apache License and the MIT License.
Copyleft licenses protect a work from being relicensed under what may end up being a more restrictive set of terms and conditions. Once a work has been released under a copyleft license, the license ensures that the work can never be released under a license that may in any way remove or diminish any of the original rights granted to the user by the license.
So if your creation benefits from a copyleft licensed work, then anyone who receives your creation must similarly benefit from your work. The GPL license is the most common copyleft license and the Mozilla Public License.
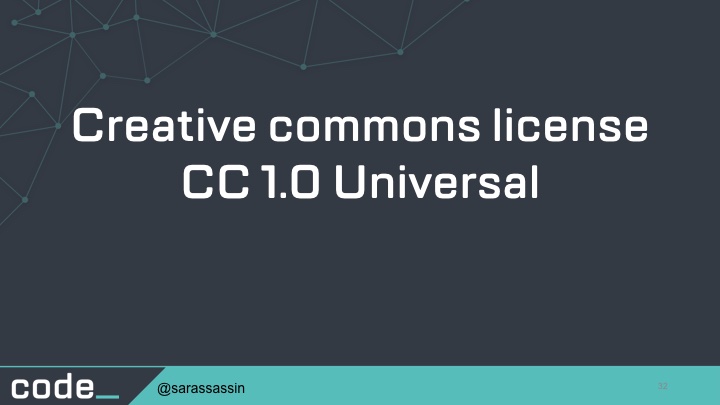
A specific license I did want to mention is the Creative Commons license. You’ll see a lot of government work use the CC 1.0 license. This means that you can copy, modify, distribute, and perform the work, even for commercial purposes, all without asking permission.
The next thing i wanted to talk about was choosing a project to contribute to an doing some prep work to give yourself a better chance of success.
You’ll want to take some time to really get to know you own personal requirements for the project you choose. These are characteristics that meet your own particular needs and interest. So you’ll want to identify what those are.
Start by considering what skills you can offer to a project. Are you a great writer or editor? Can you do language translation? Graphic design? Know certain programming languages? Maybe you have experience managing people, writing technical specifications or organizing events? Take a few minutes to write down all of your existing skills and then take a few minutes to note the skills you are wanted to enhance for yourself (if any).
Then think about what sort of things interest you.
You’re much more likely to enjoy and stick with a project if you’re working on something that is interesting and relevant to you.
If you’re passionate about voter registration and getting people to the polls, that’s something you would write down.
Take a few more minutes to write down all of your areas of interest.
Next, keeping all that in mind, you’ll want to create specific and actionable goals so you can engineer the outcome you want from the beginning.
Goals that are specific and actionable are key here.
Something like “Practice programming” is a pretty vague goal.
“Become more proficient at server-side Javascript this quarter” is specific and actionable. This is a goal that is easy for you to focus on and just as easy to see whether you’re making progress toward it.
So now that you have your goals, interests, and skills in mind it’s time to find a project. But there are thousands to choose from. How do you decide?
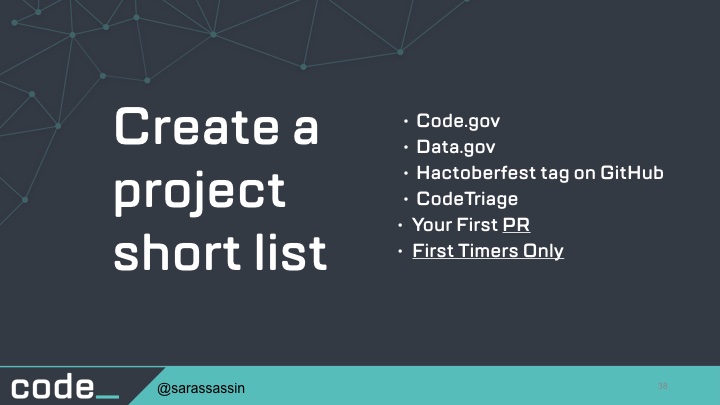
So as your taking a look projects, you’ll want to create a short list of 5-10 projects that are good candidates for you, keeping in mind the items you listed previously.
Here are several resources to get you started:
You’ve done a lot of work by this point, so the next step may not take you very long. That’s actually picking a project to start contributing to.
The smart way do this by comparing the list of projects you’ve created with your list of items from before. It’s possible that there won’t be a single project that meets all of the requirements on your list. That’s OK. As long as it meets some of them, you’ll still be moving toward your personal goals.
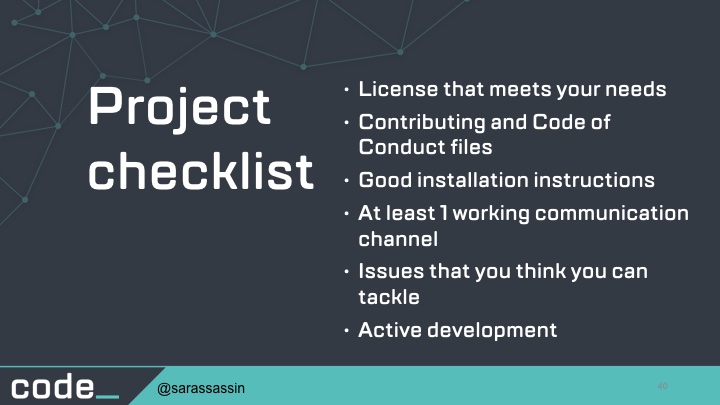
You’ll want to give yourself the best possible chance of success by choosing a project that at least this checklist.
License that meets your needs
Contributing and Code of Conduct files
Good installation instructions
At least 1 working communication channel
Issues that you think you can tackle
Active development

So now you’re going to choose an existing project task to work on or create a new task.
Most of these systems include some way to ‘tag’ issues to make them easier to categorize and locate. The tags vary from project to project, but often a project has a tag that’s used to mark certain issues as suitable for new contributors to tackle. Examples of tags that may mean this are: easy, starterbug, beginner, help wanted, or good first ticket.
If your idea doesn’t exist in the issue tracker, open a new issue. This serves two purposes. First, it warns the project that a contribution may be on its way. Second, it allows the project maintainers to review the task and confirm that it’s something the project needs or wants.
Small tasks lead to a quicker payoff and better chance of success than trying to tackle a large feature or tricky bug
Making
a
Contribution
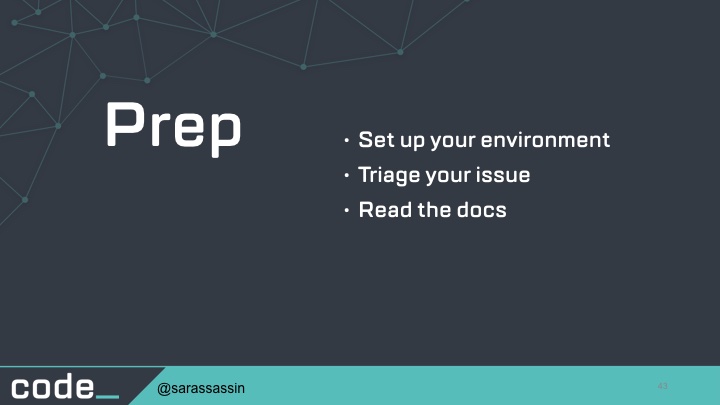
Prep
First you’ll want to do any environment setup that’s needed.
Then you want to make sure and triage your issue, you must be able to duplicate it or view it in some way.
Again go back and read the docs and make sure you follow the project’s workflow for them.
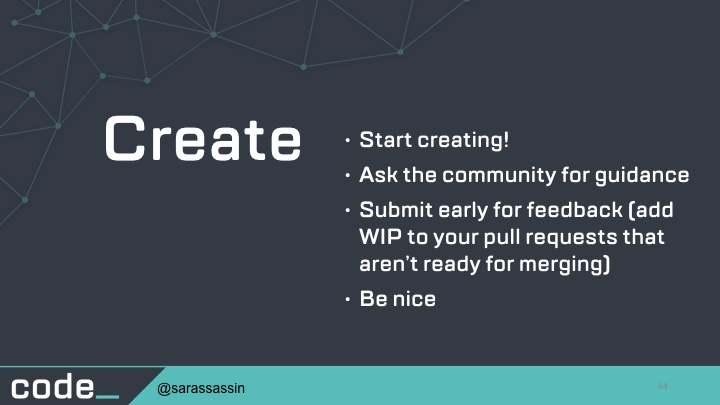
The specifics of how you create it naturally will vary depending on the type of contribution: documentation, user experience, design, code, or other types. Each contribution type obviously will have its own creation process. Some initial guidelines to follow:
Ask the community for guidance
Submit early for feedback (add WIP to your pull requests that aren’t ready for merging)
Be nice
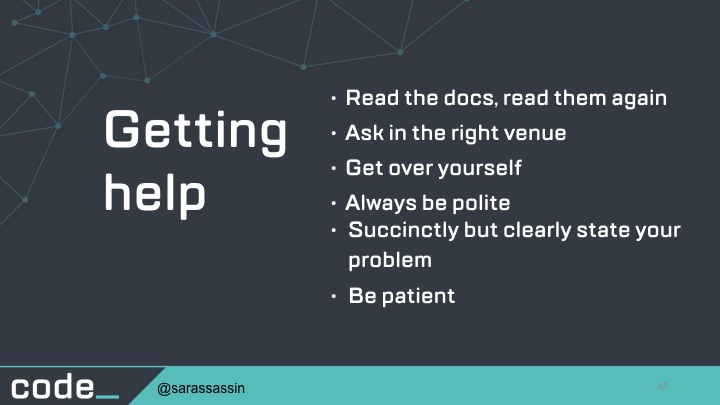
Verify you’re asking in the appropriate venue. Some projects want you to ask on the mailing list. Others in the issue tracker. Still others in the chatroom or by some other mechanism. Make sure to review the CONTRIBUTING file to verify the correct way to ask questions for that project.
2. Drop the attitude. Even if you’ve contributed to other projects before, even if you’ve been in software development for thirty years, rather than pointing out that you have a PhD in computer science and have been programming in that language for twelve years (information which is irrelevant to the suggestion at hand), simply state the problem you’ve noticed, how the code could be improved, and ask whether anyone would have a problem with you making the change. Take the time to craft your question accordingly. Run a draft past a friend just to be sure you don’t come across as a conceited jerk.
3. Always be polite. Again, no matter how frustrated you may feel, be polite when asking your question of the community. It’s OK to let your exasperation come through, as long as you don’t direct it toward the project or the community. “I’ve read all the docs and the mailing list and tried everything I could think of, but it still doesn’t work,” is an entirely acceptable statement. Say please and thank you and make sure that your words express only the problem and not any directed negativity.
4. Succinctly but clearly state your problem. State what you are trying to accomplish, what you are experiencing instead, and the full text of any error messages you see. Be brief, but make sure to include all relevant details.
5. Be patient. Remember: nearly every member of a free and open source software community is a volunteer. Each will have their own life and all of the complexities that accompany it. Give them a few days to reply to your question before you ping to ask whether anyone saw it. While you’re waiting, you could help the entire community by documenting anything you learned in your research while troubleshooting your problem (such as error messages and what they mean).
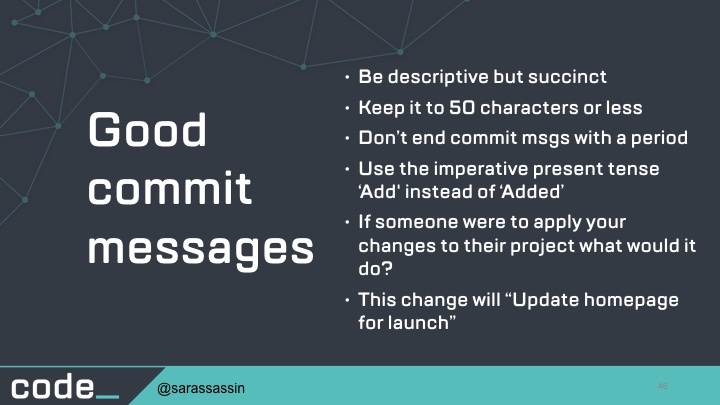
Good commit messages
Be descriptive but succinct
Keep it to 50 characters or less
Don’t end commit msgs with a period
Use the imperative present tense ‘Add' instead of ‘Added’
If someone were to apply your changes to their project what would it do?
This change will “Update homepage for launch”
Reading the commit history will always give you a better sense of the type of commit messages that project uses.

The contribution submission process is going to vary depending upon your contribution type (document, design, code, or another type) and the requirements and constraints of the project to which you’ve chosen to contribute. The most important thing you can do is read and follow the documentation.
If you start thinking of a pull request as a product, with the author as the seller, and reviewers as customers, then that helps us understand our customer in order to “sell” our pull request more effectively and get faster approvals.
Add some screenshots for your front-end changes! Screenshots simply make the job for the reviewer much easier. It’s easier to reason about front-end changes when you can visually see what’s been changed in the pull request. If you’re feeling extra generous, add a GIF or video of you using the feature (potentially in multiple browsers, if that’s important) to add some extra validation for your UI changes.

So now that you’re pull request has been entered, you may need to work with the maintainers to get it merged. Someone will need to review your changes to be sure it does what they expect.
They probably will have questions, feedback, and suggestions about your contribution. So you’ll want to collaborate with them to get your contribution into an acceptable state. Once it is in a good place, the PR will get merged.
Congratulations! You’ve just made your first contribution! Be sure the celebrate that win.
But what if your pull request never gets merged?
No matter how good and worthwhile you think your contribution is, it’s possible that the project maintainers will not accept it.
Don’t take this personally, as it’s certainly not intended that way. There are plenty of reasons your contribution may not be accepted.

Whatever the reason may be you really want to see it as a learning opportunity. You should ask how you could improve so that your next contribution has a better chance of being successful. Take that feedback and take it to heart and apply it to your next change. That’s the best way to improve.

Rinse & Repeat
Keep going! Review your goals and continue to contribute to projects that are worthwhile to you.
Thank you!
So
Many
Resources
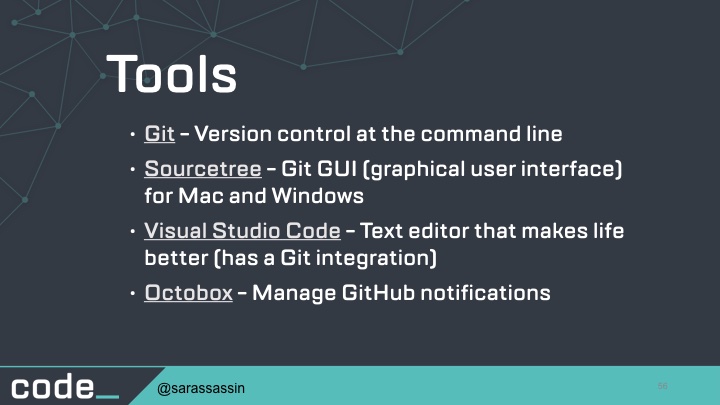
Tools
Git - Version control at the command line
Sourcetree - Git GUI (graphical user interface) for Mac and Windows
Visual Studio Code - Text editor that makes life better (has a Git integration)
Octobox - Manage GitHub notifications
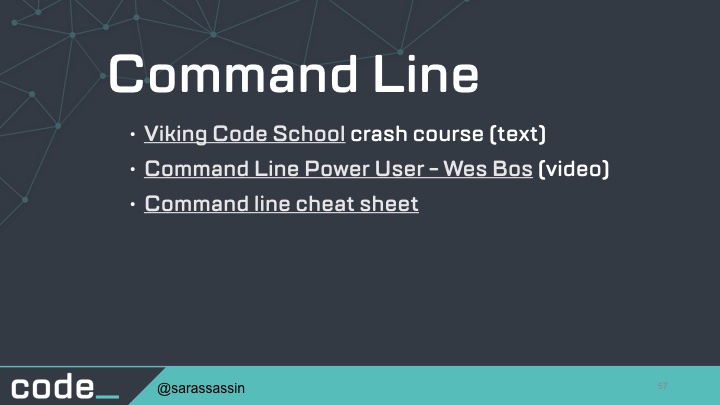
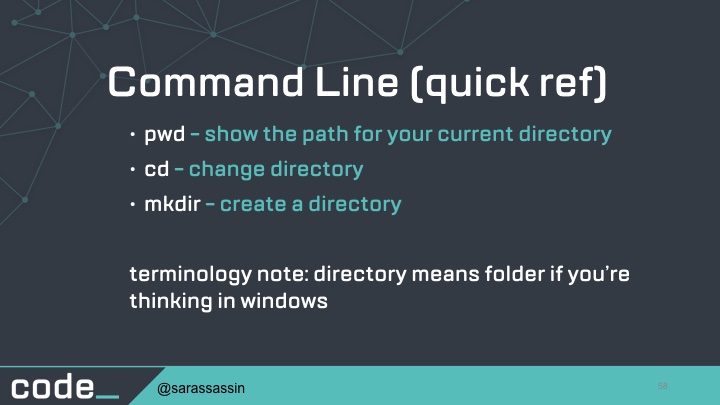
Command Line (quick ref)
pwd - show the path for your current directory
cd - change directory
mkdir - create a directory
terminology note: directory means folder if you’re thinking in windows
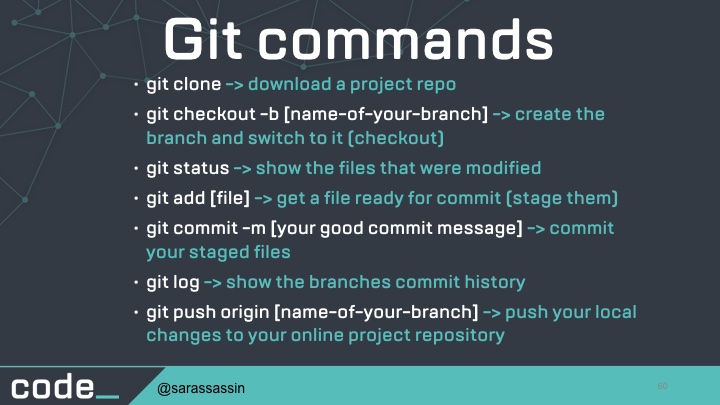
Git commands
git clone -> download a project repo
git checkout -b [name-of-your-branch] -> create the branch and switch to it (checkout)
git status -> show the files that were modified
git add [file] -> get a file ready for commit (stage them)
git commit -m [your good commit message] -> commit your staged files
git log -> show the branches commit history
git push origin [name-of-your-branch] -> push your local changes to your online project repository
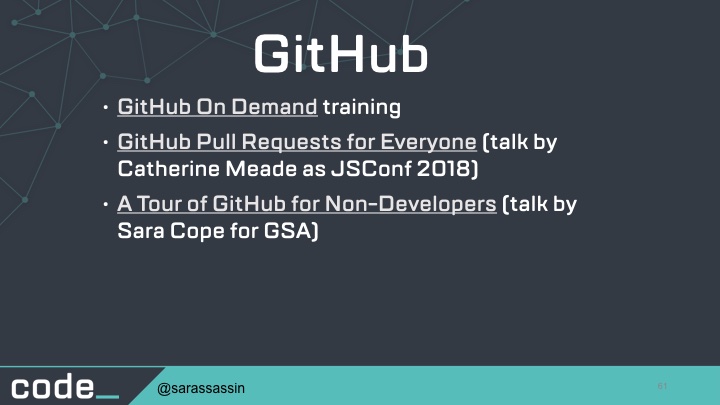
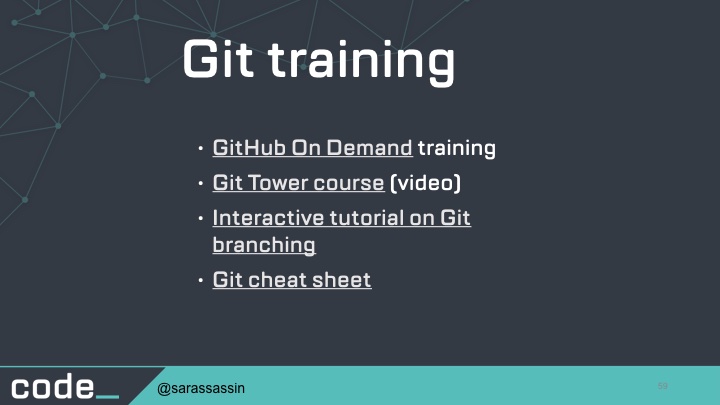
GitHub
GitHub Pull Requests for Everyone (talk by Catherine Meade as JSConf 2018)
A Tour of GitHub for Non-Developers(talk by Sara Cope for GSA)

Terminology to know
Issue - start a convo
Fork - create your own copy of the repo
Clone - download a copy to your machine
Commit - save the current version of your work
Repo (repository) - where your project lives
Pull request - submit my changes to the project
Upstream - refers to the original repo you forked
Origin - default remote repo reference that points to your fork on GitHub
Follow us @Codedotgov
Join us at GSA/code-gov
Email us code@gsa.gov
Docs @ https://developers.code.gov